Do You Re-Certify? Compare with a Master Stack? Check with Calibration Samples?
What Does Recertification Give?
The ASTM E-11 committee has done a great job of establishing three levels of testing. These levels show the probability of a sieve’s mesh to be within the permissible variations. These variations relate to the size of openings in wire-cloth used for test sieves.
Stated differently, these three levels or categories indicate the probability that a sieve adheres to E-11 standards. The levels are an indication of grade or quality.
Each of the categories provides a statistical assurance that a sieve’s mesh conforms to specified variations:
Sieve Category |
Statistical Confidence Level |
| Compliance | 66.00% |
| Inspection | 99.00% |
| Calibration | 99.73% |
These categories provide a measure of expectation of how well a sieve conforms to the ASTM standards.
These sieve categories do not change the allowable dimension range of a sieve. These variations can result in significant performance differences from one sieve to another. For example, average allowable variation (AAV) and maximum acceptable opening (MAO) is shown for three sieve sizes.
| Sieve Size | AAV | MAO |
| 25 mm | +/- 0.6mm 2.4-4.8% | 26.4mm 5.6% |
| 500µ | +/- 20.0 µ 4.0-8.0% | 585 µ 17.0% |
| 25µ | +/- 3.0 µ 12.0-24.0% | 41 µ 64.0% |
These examples show that allowable variation dramatically increases as the mesh size becomes smaller. Likewise, operating performance differences between individual sieves are affected.
The certification and recertification process gives an assurance that the mesh in a sieve conforms to ASTM/ISO tolerances. However, this does not deal with the operational performance of a sieve.
Master Stacks Can Be Used to Check Operational Performance.
A master stack is a set of sieves that produces a known result. These sieves are usually specified at a high level of statistical assurance. They should be at least Inspection Grade sieves. The master stack provides a baseline to check the performance of working sieves.
Problems with a working sieve in a production stack can be identified by comparing results with the master stack. A test run comparing retained amounts on each sieve in the master stack with the production stack will highlight problem sieves. When sieves in the master stack need to be replaced, it is useful to have a set of sieves that match the performance of the master stack. This is often accomplished by preparing and storing away this matched set of sieves. These matched sieves can then be used as replacement for the master stack. A new set of matched sieves is usually prepared before the previous set is put into service.
Master samples are sometimes used instead of a Master Stack. In theory, this would be the ideal approach. However problems with maintaining master samples limit their use.
Calibration with Precision Spheres Provides an Operational Measure
Calibration with precision spheres is a superior way to predict and evaluate a sieve's performance.
Sieve calibration standards are specially prepared vials of precision spheres. These standards are prepared to a tolerance of +/- 1 micron.
The process of calibration with spheres is as follows:
- The sieve to be tested and a sieve pan are assembled.
- The contents of the vial are emptied onto the sieve.
- The sieve, sieve pan and sample are weighed.
- The sieve is shaken by hand or on a mechanical shaker for 2 minutes.
- The spheres in the pan are emptied.
- The sieve and the pan are re-weighed.
- The percent of the original spheres that passed into the pan is calculated.
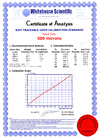
- This result is plotted on a graph that comes with the samples, or the Whitehouse Sieve Aperture Calculator can also be used.

The result is provided as a mean mesh opening number. The significance of this is that this gauge is calculated from the actual performance of a sieve. It represents a measure of what you will get in production testing.
This objective measure can be used as a reference to check changes in operating characteristics of working sieves caused by things such as routine wear or cleaning damage. It's a better gauge of performance than recertification.
A Calibration System
A typical sieve calibration system is built on the concept of maintaining a record for each sieve. Most sieves have a serial number that serves as the basis of identification.
When a new sieve is received, a calibration is performed. The results are recorded on the sieve record (paper or digital base file). The mean opening result is checked against the acceptable limits. These limits are usually established by quality control or production departments.
A sieve’s performance will change due to wear and as a result of damage during cleaning.
A typical system includes a schedule of calibration checks for each sieve. These are based on usage and mesh size. Usually, the smaller sizes are checked more frequently.
In addition, if a stack is not performing as expected, the sieves are checked to find those that are out of tolerance.
This type of calibration system will provide QC data based on performance in the production environment. Recertification of a sieve will not do this.
Takeaways
The ASTM/ISO Certification process provides a basis for assuring that a sieve is of a desired quality level. However, the acceptable range of openings, published in the standard, can be considerable. This variation increases as the mesh opening size decreases.
The certification process does nothing to check the performance, neither when new nor after continuous use. Consequently, recertification does not predict or correlate to performance. At best, recertification can be used as an indirect indicator of wear or damage.
Comparison of performance to a master sieve stack overcomes this lack of operating data. The downside of the master stack approach is that it is somewhat cumbersome and it is hard to get exact matches when a master sieve needs to be replaced.
The use of calibration beads to asses the operational characteristics of a sieve offers a direct correlation of individual sieves to definitive operational measures - Actual Mean Opening - calculated from the result of a live sieve test.
As an idealist, I favor the calibration or comparative approaches such as master stacks or a calibration bead system, rather than re-certification, to assess a sieve's performance. These direct performance-related approaches have not yet replaced certification as the predominant way of evaluating a sieve.
I hope that this discourse has been useful. Please share it with your colleagues who have sieving as part of their process.
I remain semi-mystified.
Art
P.S. You can subscribe to our articles and newsletters by placing your email address in the space to the right of the title.
P.P.S. Here is a great video about sieve calibration using calibration spheres.
P.P.P.S. A little bit of Sieving History and a Primer for newbies to sieving. A Webinar


